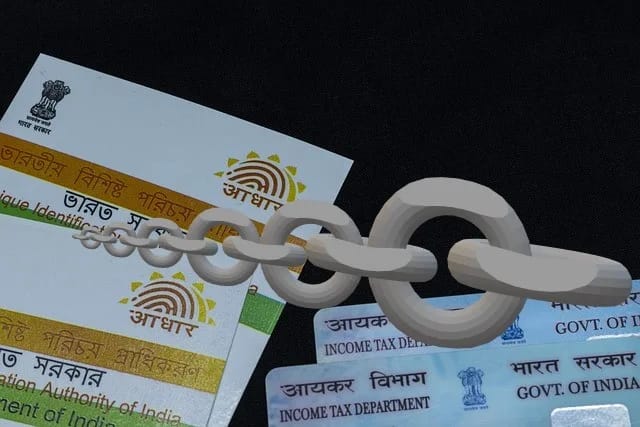
#What is the last date for linking Aadhar with PAN Number?
The last day for linking Aadhar with PAN is 30th June 2023.
#What is the Penalty for not linking Aadhar with PAN?
The amount that one has to pay For not linking aadhar with pan is Rs 1000/-.
#The link for checking Aadhar Number-PAN linking status is below:
#Why Aadhar number is important?
Aadhaar is a 12-digit unique identification number issued by the Unique Identification Authority of India (UIDAI), which is a statutory authority established under the Indian government. It act as an identity proof as well as the address profess, and validate that he/she is a resident of India. The Aadhaar card contains demographic and biometric information of the cardholder and is considered one of the world’s largest biometric identification systems.
Objective of introducing Aadhar Card in India:
1. Purpose: The primary purpose of Aadhaar is to provide a unique identification number to all residents of India. It is meant to serve as a single identification document that can be used for various purposes, including accessing government services, welfare benefits, and financial transactions.
2. Data Collection: When applying for an Aadhaar card, individuals need to provide their demographic details such as name, date of birth, address, and biometric information including fingerprints and iris scan. These details are stored securely in a centralized database maintained by UIDAI.
3. Unique Identification: Aadhaar assigns a unique 12-digit number to each individual, which remains valid for their lifetime. The number is linked to the individual’s demographic and biometric information.
4. Authentication: Aadhaar enables biometric and demographic authentication, which helps in verifying the identity of an individual. This authentication can be done through fingerprint or iris scan, or by providing the Aadhaar number and demographic details.
5. Voluntary Participation: While Aadhaar is widely used and encouraged for various services, it is not mandatory for all individuals. However, certain services and benefits provided by the government require Aadhaar authentication.
6. Secure and Private: UIDAI takes several measures to ensure the security and privacy of Aadhaar data. Stringent security protocols and encryption techniques are used to protect the stored information. Moreover, the Aadhaar Act restricts the sharing of personal information without the individual’s consent.
7. Linking with Services: Aadhaar is often linked to various services, such as bank accounts, mobile numbers, and income tax filings. This linkage helps in eliminating duplicate or fake identities, reducing fraud, and ensuring efficient delivery of services.
8. Mobile Application: UIDAI has developed a mobile application called mAadhaar, which allows individuals to carry their Aadhaar information on their smartphones. The app provides features like biometric locking and unlocking, demographic updating, and eKYC (electronic Know Your Customer) services.
It is advisable to refer to the official UIDAI website or consult relevant government sources for the most up-to-date information.
#PAN numbe kya hai?
PAN stands for Permanent Account Number. It is a unique, ten-character alphanumeric identifier issued by the Income Tax Department of India. PAN serves as a universal identification key for individuals, companies, and entities associated with financial transactions and tax obligations in India.
Here are some key points about PAN:
1. Purpose: The primary purpose of PAN is to track financial transactions and ensure tax compliance. It is used as an identification number for various financial activities, including filing income tax returns, making investments, opening bank accounts, conducting high-value transactions, and more.
2. Format: PAN is a ten-character alphanumeric code. In the PAN Number the first five characters are letters, followed by numbers of four characters are, and the last character in the end is a letter. For example, the format could be in the form of “ABCDE1234F.”
3. Unique Identification: Each PAN number is unique and remains unchanged for an individual or entity throughout their lifetime. It helps in distinguishing one taxpayer from another and is used as a reference for tax-related information.
4. PAN Card: When a person or entity applies for a PAN, they receive a physical PAN card issued by the Income Tax Department. The PAN card contains the PAN number, the name of the PAN cardholder, their photograph, and other details such as date of birth (if applicable).
5. PAN Verification: PAN can be verified through various methods, such as using the Income Tax Department’s online portal, SMS-based verification, or by contacting the designated PAN service centers. Verification helps in confirming the authenticity and validity of a PAN number.
6. Importance for Taxation: PAN is essential for filing income tax returns, paying taxes, and participating in any financial transaction above a specified threshold. It helps the government in tracking taxable transactions and preventing tax evasion.
7. Linkage with Aadhaar: It has become mandatory to link Aadhar number with PAN as per the government regulations. The linking of PAN and Aadhaar is done to ensure better tax compliance and to eliminate duplicate or fake identities.
For the most up-to-date and detailed information about PAN, it is advisable to refer to the official website of the Income Tax Department or consult relevant government sources.
#How to link Aadhar Card with PAN Number?
To link your Aadhaar card with your PAN (Permanent Account Number) in India, you can follow these steps:
1. Visit the official e-filing website of the Income Tax Department of India. The website URL is https://www.incometax.gov.in/iec/foportal/
2. On the website’s homepage, under the “Quick Links” section, click on the “Link Aadhaar” option.
3. You will be redirected to a new page where you will find the “Link Aadhaar” form.
4. Fill in the required details in the form:
– Enter your PAN number.
– Enter your Aadhaar number.
– Enter your name as mentioned on your Aadhaar card.
– You can select the option to have only the year of birth displayed on the PAN card instead of the full date of birth (this is optional).
– Enter the captcha code as shown in the image.
5. Double-check the entered details for accuracy.
6. If your Aadhaar card only contains the year of birth, you need to tick the box to agree to share your date of birth with the Income Tax Department.
7. If you have already mentioned your Aadhaar number on the PAN card, make sure the name on both documents matches exactly. If not, you will have to update either your Aadhaar card or PAN card with the correct name before proceeding.
8. Once you have filled in all the details and reviewed them, click on the “Link Aadhaar” button.
9. A pop-up message will appear confirming the successful linkage of your Aadhaar card with your PAN.
Alternatively, you can link your Aadhaar card with your PAN through SMS by following these steps:
1. Open the messaging app on your mobile phone.
2. Create a new SMS.
3. Type UIDPAN followed by a space.
4. Enter your 12-digit Aadhaar number.
5. Type another space and enter your 10-digit PAN number.
6. Send the SMS to 567678 or 56161.
7. Shortly after sending the SMS, you will receive a confirmation message regarding the status of the linkage.
#Aadhar Card ke liya kaisay APPLY KAREIN
Generating an Aadhaar card involves the process of enrolling for Aadhaar and subsequently receiving the physical card. Here are the general steps to follow for generating an Aadhaar card from the official website of UIDAI (https://uidai.gov.in/):
1. Visit the UIDAI website: Go to the official website of UIDAI by typing or clicking on the URL: https://uidai.gov.in/.
2. Locate the Enrollment section: On the homepage, navigate to the Enrollment section, usually found under the “Aadhaar Enrollment” or “Enrollment and Update” tab.
3. Find an Aadhaar Enrollment Center: Click on the “Locate an Enrollment Center” or similar option to find the nearest Aadhaar Enrollment Center. You can search by state, city, or pin code.
4. Book an appointment (if applicable): Some centers offer online appointment booking to avoid waiting in long queues. If this option is available, book an appointment for the enrollment process.
5. Visit the Enrollment Center: On the appointed date and time (if applicable), visit the selected Enrollment Center. Carry the required documents and details as mentioned on the UIDAI website. Typically, documents such as proof of identity, proof of address, and proof of date of birth are required.
6. Submit the enrollment form: At the Enrollment Center, fill out the Aadhaar enrollment form with accurate personal details, including name, address, date of birth, etc. Ensure that every detail entered is correct.
7. Provide biometric data: You will be asked to provide biometric data, including fingerprints and iris scans, at the center. Ensure that your biometric information is captured correctly.
8. Receive acknowledgment slip: After completing the enrollment process, you will be given an acknowledgment slip with an enrollment number. This slip is important for tracking the status of your Aadhaar application.
9. Wait for processing and generation: Once you have submitted your enrollment form and biometric data, your application will be processed by UIDAI. It may take some time for the Aadhaar card to be generated.
10. Check Aadhaar status: To track the status of your Aadhaar card, you can visit the UIDAI website and click on the “Check Aadhaar Status” or similar option. Enter the enrollment number from the acknowledgment slip and the required details to check the status.
11. Download Aadhaar card (e-Aadhaar): Once your Aadhaar card is generated, you can download a digital copy called e-Aadhaar from the UIDAI website. Visit the “Download Aadhaar” or “Download e-Aadhaar” section and enter the necessary details, including the enrollment number or Aadhaar number, to download the e-Aadhaar.
#AAdhar and PAN Validity kaisay CHECK kairey
To check the STATUS of the Aadhaar-PAN card linking in India, you can follow these steps:
1. Visit the Income Tax Department’s e-filing website. The URL for the website is https://www.incometaxindiaefiling.gov.in/home.
2. On the website’s homepage, locate and click on the “Link Aadhaar” option. It is usually found under the “Quick Links” section or under the “Profile Settings” menu.
3. You will be redirected to the Aadhaar-PAN linking page.
4. On the linking page, look for the “Check Status of Linking” or similar option. Click on it to proceed.
5. A new form will appear on the screen, prompting you to enter your PAN number and Aadhaar number.
6. Details REQUIED to be filled in the form:
– Enter your 10-digit PAN number.
– Enter your 12-digit Aadhaar number.
– Enter the captcha code shown in the image.
7. Double-check the entered details for accuracy.
8. Once you have filled in the details, click on the “View Link Aadhaar Status” or similar button.
9. The system will then display the status of the linking process.
– If the Aadhaar-PAN linking is successfully completed, the status will show as “Linked.”
– If the linking is not done or is pending, the status will show as “Not Linked” or “Pending.”
10. Make a note of the displayed status for future reference.
12. Print and use e-Aadhaar: After downloading the e-Aadhaar, open the PDF file and print a physical copy of it. The e-Aadhaar is equally valid as the physical Aadhaar card and can be used for various purposes.
It’s important to note that these steps provide a general overview of the Aadhaar generation process from the UIDAI website. The exact steps or procedures may vary, and it is advisable to refer to the official UIDAI website or consult relevant government sources for the most up-to-date and accurate information.
Apply for Aadhar Card
#Following are the steps for applying for PAN CARD.
Follow the following steps to apply for the PAN CARD:
1. Visit the official website of NSDL (National Securities Depository Limited) for PAN applications. The website URL is https://www.onlineservices.nsdl.com/paam/endUserRegisterContact.html .
2. On the homepage, click on the “Apply” button under the “New PAN” section.
3. Select the appropriate category of PAN application from the available options. For individuals, choose “New PAN – Indian Citizen (Form 49A).”
4. Fill in the required details in the application form:
– Select the appropriate application type, such as “New PAN” or “Changes or Correction in PAN Data.”
– Select the category of the applicant, such as individual, company, or trust.
– Enter your personal details, including full name, date of birth, address, contact number, and email address.
– Provide details of your parent/guardian (if applicable).
– Select the appropriate document as proof of identity, address, and date of birth, and enter the corresponding document number.
– Verify the entered details for accuracy.
5. Fill in the AO (Assessing Officer) code: The AO code is a jurisdictional code that determines the Income Tax Office to which your PAN application will be submitted. You can find the appropriate AO code on the NSDL website by using your address details.
6. Upload supporting documents: Scan and upload the necessary documents as proof of identity, address, and date of birth. The acceptable documents are specified on the NSDL website.
7. Pay the processing fee: Pay the prescribed processing fee for PAN application through online payment modes such as credit/debit cards, net banking, or UPI (Unified Payments Interface). The fee amount may vary depending on the communication address (within India or outside India) and the payment mode chosen.
8. Submit the application: After completing the form, reviewing the details, and making the payment, submit the application online. You will receive an acknowledgment number upon successful submission.
9. Print and send the documents: After submission, you need to print the filled application form, affix two recent passport-size photographs, and sign in the designated places. Send the printed application form along with the required supporting documents to the address mentioned on the NSDL website within 15 days of online application.
10. Track application status: You can track the status of your PAN application on the NSDL website using the acknowledgment number received upon submission. It usually takes around 15-20 working days to process the PAN application.
11. Receive PAN card: Once the application is processed and approved, you will receive your PAN card at the communication address provided in the application form. The PAN card is dispatched by the Income Tax Department.
It’s important to note that these steps provide a general overview of the PAN application process. The exact steps or procedures may vary, and it is advisable to refer to the official NSDL website or consult relevant government sources for the most up-to-date and accurate information on applying for a PAN card.
#Where is Income Tax office in India?
The Income Tax Department in India has offices located across the country. The department has a hierarchical structure with several regional and local offices to manage tax administration and related matters. The exact locations of these offices can vary depending on the city and region. Here are some key offices of the Income Tax Department in India:
1. Central Board of Direct Taxes (CBDT): The CBDT is the apex body for policy and administrative matters of direct taxes in India. It is located in New Delhi.
2. Principal Chief Commissioner of Income Tax (PCCIT) Offices: These offices are responsible for supervising the administration of income tax in a particular region. Each region typically has one PCCIT office. They are usually located in major cities such as Mumbai, Chennai, Kolkata, and Delhi.
3. Chief Commissioner of Income Tax (CCIT) Offices: These offices operate under the PCCIT offices and are responsible for the administration of income tax in specific zones within a region. They are located in various cities within the region.
4. Principal Commissioner of Income Tax (PCIT) Offices: These offices work under the CCIT offices and are responsible for the administration of income tax in specific areas within a zone. They are located in various cities and towns within the respective zones.
5. Income Tax (IT) Offices: These are local income tax offices situated in cities and towns across India. They handle tax-related matters for specific jurisdictions and are responsible for tax assessments, filing of returns, and taxpayer services at the local level.
To find the specific Income Tax Office or related office in your area, it is recommended to visit the official website of the Income Tax Department (https://www.incometaxindia.gov.in) or contact the nearest local income tax office.
#KAISAY APNI ADHAR PHOTO CHANGE KAREY
Please note that the process may have changed or been updated since then, so it is recommended to visit the official UIDAI website (https://uidai.gov.in) for the most accurate and up-to-date information. Here are the general steps for updating Aadhaar card details:
1. Visit the official UIDAI website: Go to the official website of UIDAI by typing or clicking on the URL: https://uidai.gov.in/.
2. Look for the “Update Aadhaar Details” or similar option: On the UIDAI website, locate the section related to updating Aadhaar details. It is usually found under the “Aadhaar Update” or “Update Your Aadhaar” section.
3. Choose the mode of update: UIDAI provides various modes for updating Aadhaar details, including online, by post, or by visiting an Aadhaar Seva Kendra. Select the online mode if available.
4. Fill the Aadhaar Update Form: If the online mode is available, you will be directed to the Aadhaar Update Form. Fill in the required details, including your Aadhaar number and the details you want to update, such as the photograph.
5. Provide supporting documents: For updating the photograph, you may be required to provide supporting documents as proof of the new photograph. The specific document requirements will be mentioned on the UIDAI website. Ensure that you have the necessary documents in the specified format.
6. Upload documents and submit the request: Scan the supporting documents and upload them as per the instructions provided on the website. Review the form and documents for accuracy before submitting the update request.
7. Generate and note down the Update Request Number (URN): After submitting the update request, you will receive a URN. Make a note of this number as it will be used to track the status of your update request.
8. Check status and download updated Aadhaar: You can check the status of your update request on the UIDAI website using the URN. Once the update is processed and approved, you can download the updated Aadhaar card, which will include the new photograph.
For the most accurate and detailed instructions on updating your Aadhaar details, it is advisable to refer to the official UIDAI website or consult relevant government sources.
#if PAN and AADHAR IS NOT LINKED, WHAT WILL HAPPEN?
- PAN will remain in nonfunctional MODE or become inoperative.
- Interest on FUND will be effected during inoperative period.
- TDS will be collected at above normal level or rate.
- Penalty of Rs 1000.00